运行环境
windows10+Anaconda3+pytorch1.8+python3.8+pycharm
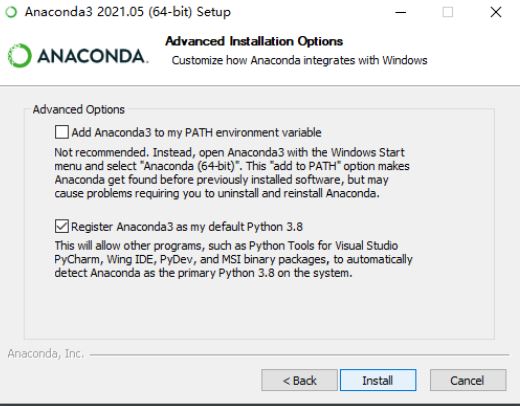
安装Anaconda
1.访问Anaconda官网下载Anaconda3并按照安装程序引导完成安装
2.找到.condarc文件
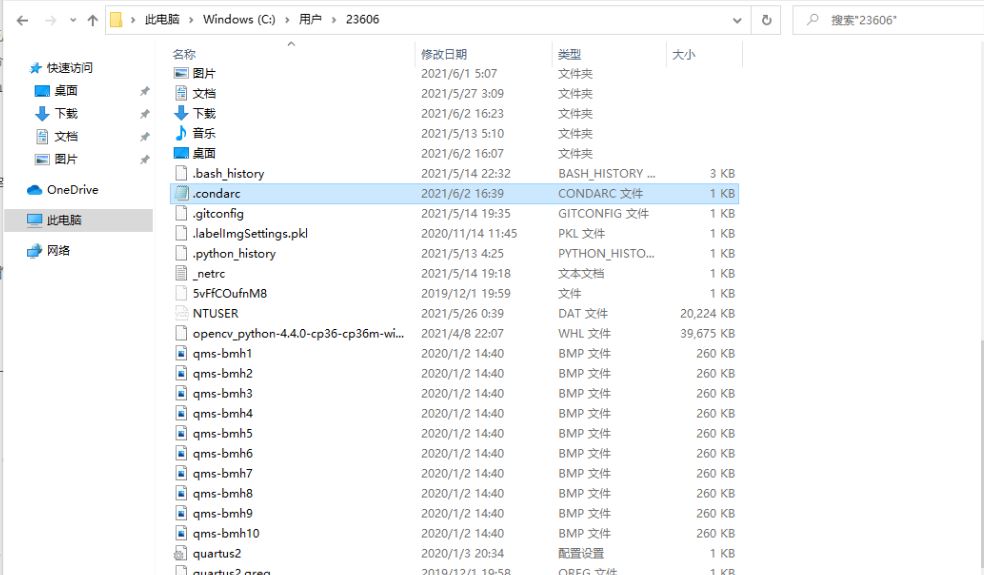
将channels下的default项去掉
3.启动Anaconda Prompt
添加镜像源
1
2
3
4
5
6
7
8
9
10
11
| conda config --add channels https://mirrors.tuna.tsinghua.edu.cn/anaconda/pkgs/free/
conda config --add channels https://mirrors.tuna.tsinghua.edu.cn/anaconda/cloud/conda-forge
conda config --add channels https://mirrors.tuna.tsinghua.edu.cn/anaconda/cloud/msys2/
conda config --add channels https://mirrors.ustc.edu.cn/anaconda/pkgs/main/
conda config --add channels https://mirrors.ustc.edu.cn/anaconda/pkgs/free/
conda config --add channels https://mirrors.ustc.edu.cn/anaconda/cloud/conda-forge/
conda config --add channels https://mirrors.ustc.edu.cn/anaconda/cloud/msys2/
conda config --add channels https://mirrors.ustc.edu.cn/anaconda/cloud/bioconda/
conda config --add channels https://mirrors.ustc.edu.cn/anaconda/cloud/menpo/
conda config --set show_channel_urls yes
|
安装Pytorch&Cuda&Cudnn
1.创建虚拟环境
conda create -n yolov5 python=3.8
2.安装pytorch,torchvision,torchaudio,cudatoolkit
conda install pytorch torchvision torchaudio cudatoolkit=10.2 -c pytorch
这里安装的pytorch默认为官网的最新版,cudatoolkit指定为10.2,如有其它版本需要
则访问以前版本找到所需版本
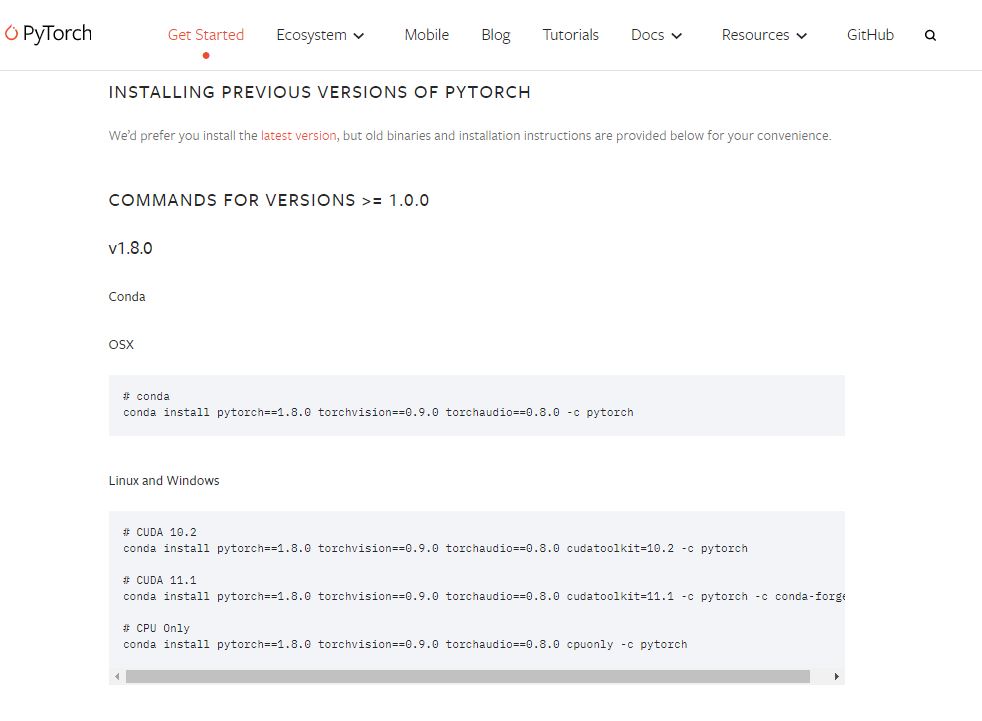
至于cudatoolkit的版本,则需要根据nvidia驱动程序的版本来选择
安装YOLOv5
由于YOLOv5版本在不断更新,依赖也一直在变化
本文的YOLOv5下载链接为:https://pan.baidu.com/s/1ZltpFOtg12Q-824O5WRn8A
提取码:1234
1.安装YOLOv5
conda activate yolov5
切换到yolov5-develop目录
pip install -r requirements.txt
到这里依赖全部安装完成
2.使用pycharm打开yolov5-develop,编译环境选择刚刚所创建的虚拟环境
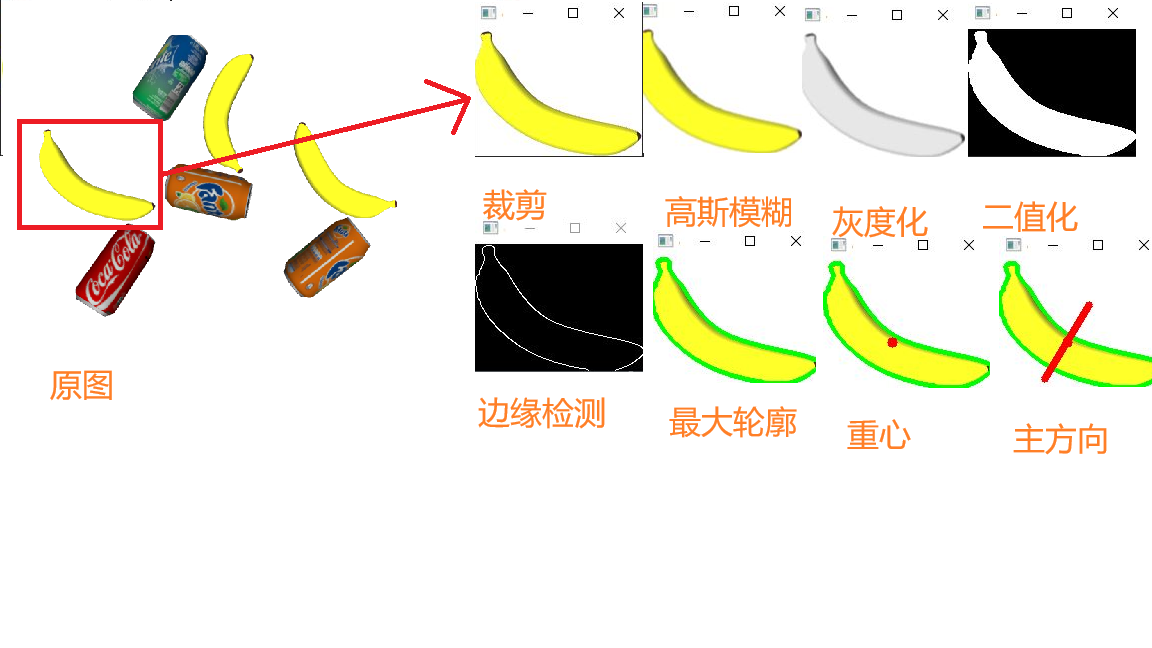
数据集准备
原始图片35张
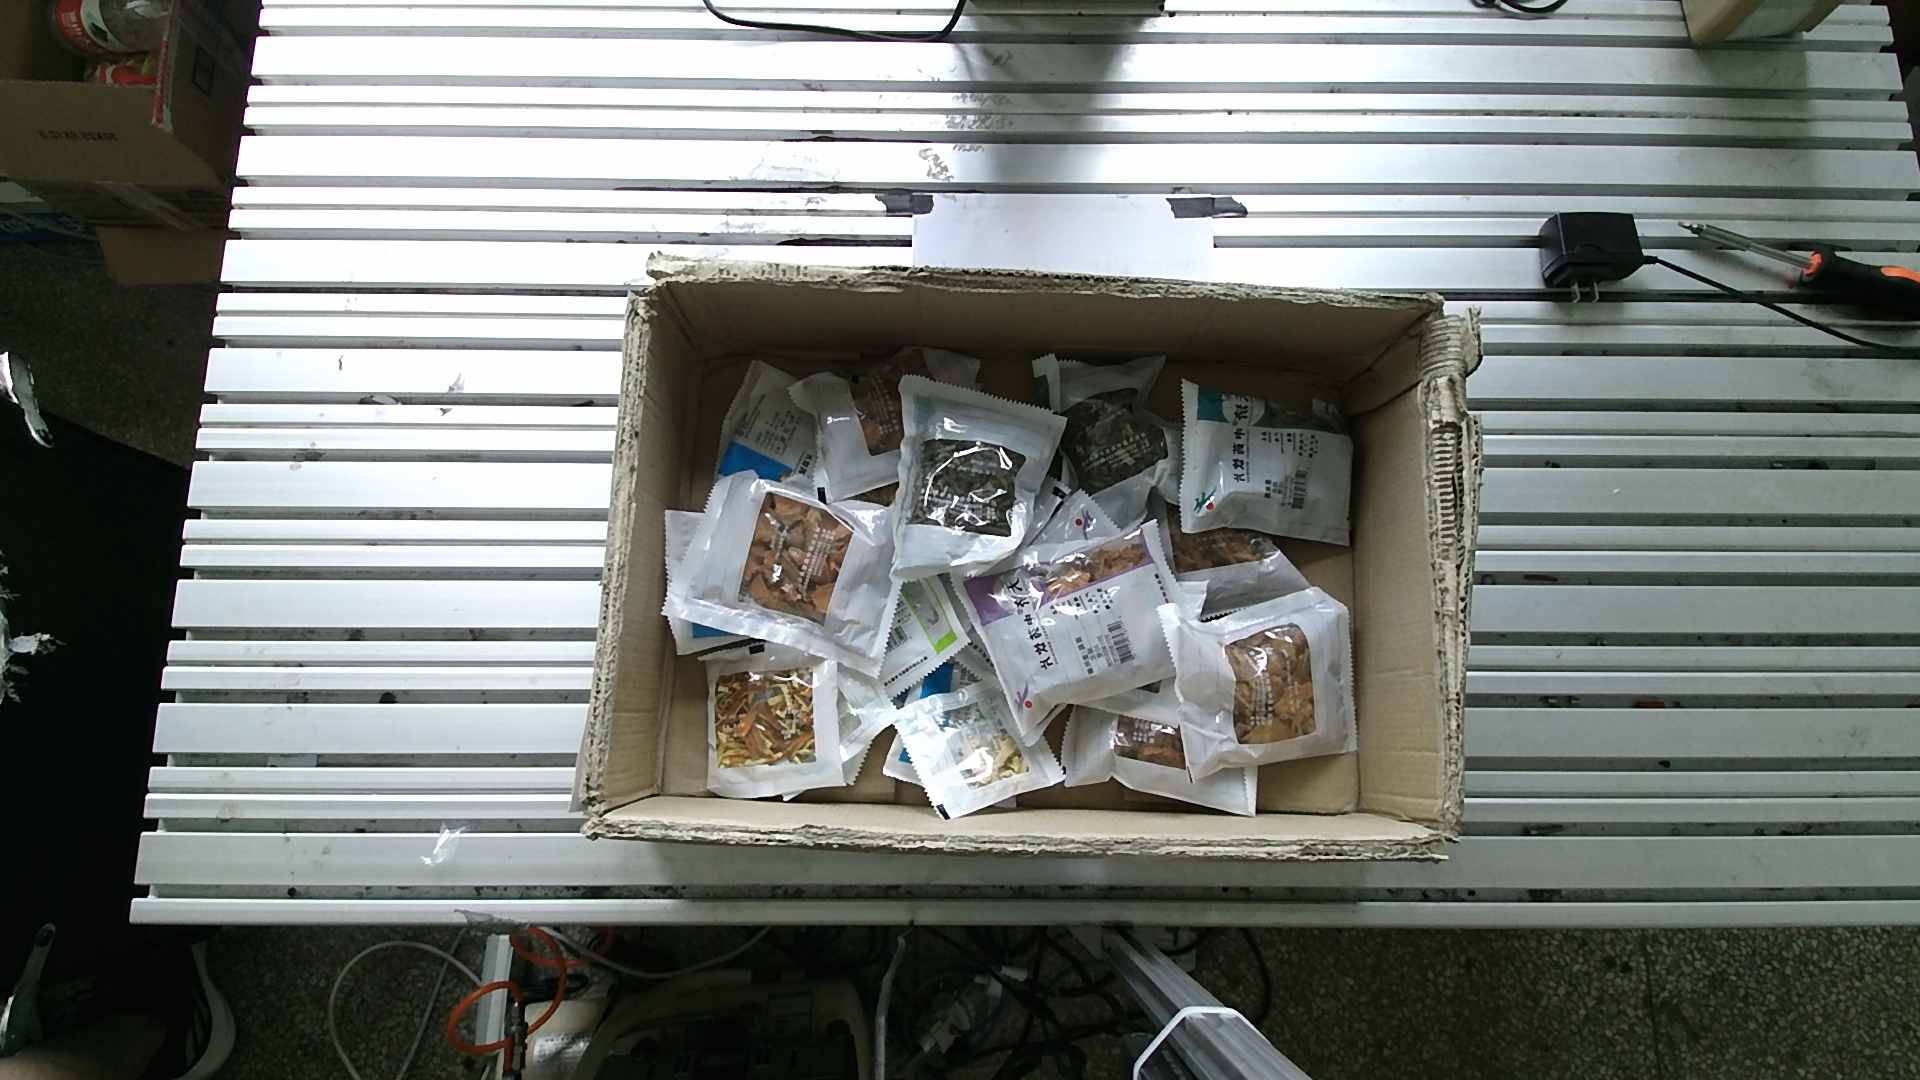
使用labelimg进行数据集标注
标注好后由于样本数量太小,需要进行数据增广
具体标注和增广过程这里不在赘述
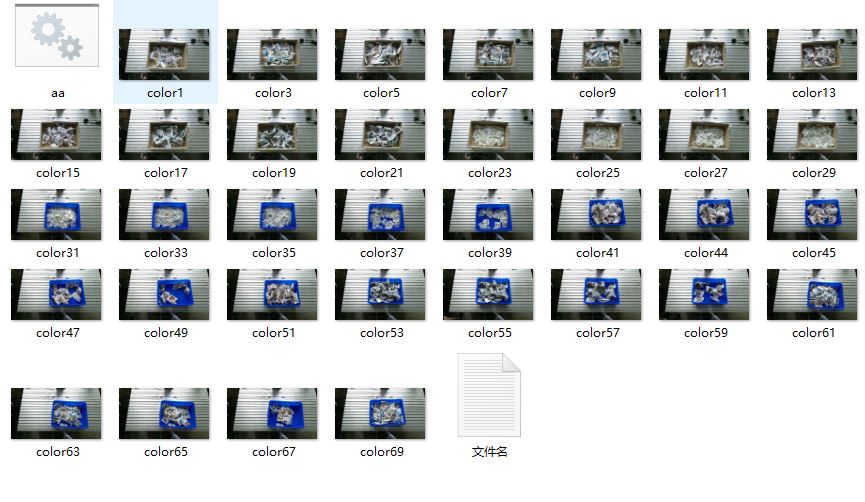
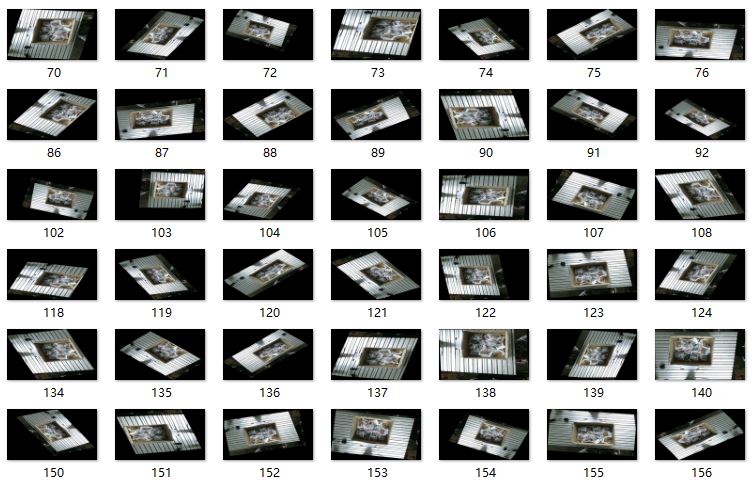
数据增广后的部分样本:
相应的每一张图片都有对应的标签,标注时要将标签保存为txt格式的,如果是xml格式的还需进行格式转换
XML转txt
1
2
3
4
5
6
7
8
9
10
11
12
13
14
15
16
17
18
19
20
21
22
23
24
25
26
27
28
29
30
31
32
33
34
35
36
37
38
39
40
41
42
43
44
45
46
47
48
49
50
51
52
| import os
import xml.etree.ElementTree as ET
classes = ["aeroplane", "bicycle", "bird", "boat", "bottle", "bus", "car", "cat", "chair", "cow", "diningtable", "dog",
"horse", "motorbike", "person", "pottedplant", "sheep", "sofa", "train", "tvmonitor"]
def xyxy2xywh(size, box):
dw = 1. / size[0]
dh = 1. / size[1]
x = (box[0] + box[2]) / 2 * dw
y = (box[1] + box[3]) / 2 * dh
w = (box[2] - box[0]) * dw
h = (box[3] - box[1]) * dh
return (x, y, w, h)
def voc2yolo(path):
print(len(os.listdir(path)))
for file in os.listdir(path):
label_file = path + file
out_file = open(path.replace('Annotations', 'labels') + file.replace('xml', 'txt'), 'w')
tree = ET.parse(label_file)
root = tree.getroot()
size = root.find('size')
w = int(size.find('width').text)
h = int(size.find('height').text)
for obj in root.iter('object'):
cls_id = 0
bndbox = obj.find('bndbox')
box = [float(bndbox.find('xmin').text), float(bndbox.find('ymin').text), float(bndbox.find('xmax').text),
float(bndbox.find('ymax').text)]
bbox = xyxy2xywh((w, h), box)
out_file.write(str(cls_id) + " " + " ".join(str(x) for x in bbox) + '\n')
if __name__ == '__main__':
path = 'Annotations/'
voc2yolo(path)
|
完成转换后每一张图片都有一个对应的txt文件
训练前的准备
新建medicine_data文件夹,文件结构:
—-medicine_data
—-images
—-labels
—-medicine.yaml
images即为而训练集,labels文件夹下为训练集的标签
其中medicine.yaml:
1
2
3
4
5
6
| train: D:/medicine_data/images/
val: D:/medicine_data/images/
nc: 1
names: ['m']
|
打开yolov5-develop/models下的的yolov5s.yaml
将nc一项的值改为1
开始训练
在pycharm的Terminator中运行
python train.py --data D:/medicine_data/medicine.yaml --cfg ./models/yolov5s.yaml --weights ./weights/yolov5s.pt --batch-size 8 --epochs 450
这里的batch-size根据显存大小适当调整,总共训练450个epoch
训练开始后可能出现“页面太小”的报错,这时候要进入高级系统设置下 的性能调整分给D盘的虚拟内存大小
正在训练
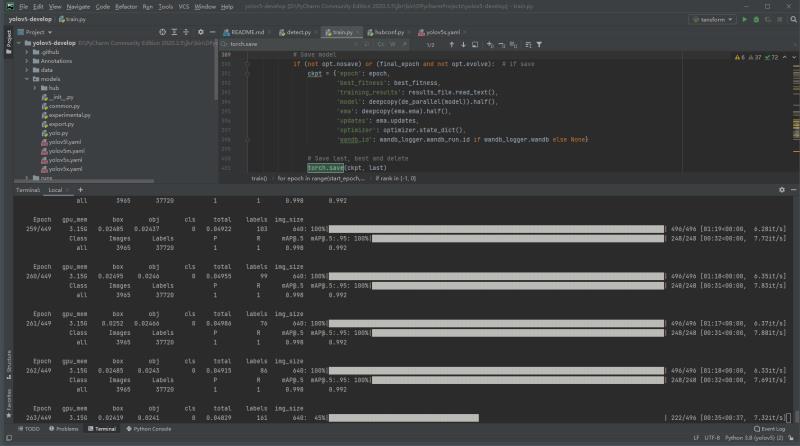
如果想要训练过程可视化,需要先安装wandb
pip install wandb
大概训练了十三的小时后,得到了训练好的最后一次模型和最佳模型
训练结果
训练后的模型保存在runs/train目录下面

检查训练效果
python detect.py --source data/images/medicine5.jpg --weights ./runs/train/exp38/weights/best.pt --conf 0.4
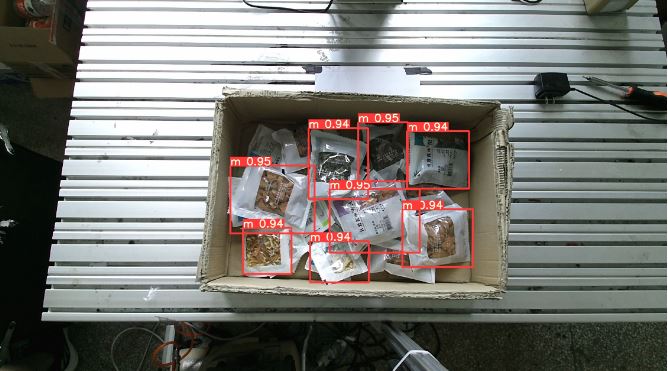
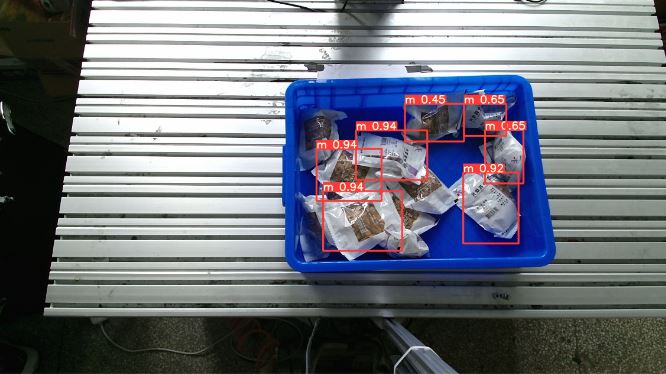
可以看到大部分在表面的中药软包装都检测出来了并且置信度高,少部分被覆盖的没有检测出来,检测效果良好
总结
使用yolov5进行中药软包装的最终检测效果良好,但是本项目也存在明显的缺陷:原始样本数太少,虽然可以数据增广但是许多数据相比原始数据仍没有很大的变换,如果一开始准备大量数据然后进行几倍的增广可能到最后的训练和检测结果会和现在有较大出入